HowTo: Importing SSL Certificates on the NetScaler

This blogpost is also posted on the PepperCrew website.
 

There are a lot of different certificate file formats that can be involved in a SSL certificate implementation as explained in my previous blogpost. This blogpost focused on the different methods to create and import these files onto the Citrix NetScaler and showing you how to assign the right SSL certificate to your virtual server for load balancing or gateway services. You can read all about the different certificate (and certificate archives) file formats in my previous post.

With all the instructions included in this blogpost it has become a rather long post, so I’ve added a small index to quickly navigate to the different sections:
     – Creating a private key on the NetScaler
     – Creating the certificate signing request on the NetScaler
     – Creating the certificate signing request with Internet Information Service
     – Importing a PKCS#12 (.pfx file format) certificate store on the NetScaler
     – Importing a PEM certificate store on the NetScaler
     – Importing the root and/or intermediate certificates on the NetScaler
     – Creating the certificate chain on the NetScaler
     – Binding the SSL certificate to a virtual server on the NetScaler

Creating a private key on the NetScaler

As pointed out correctly by Barry Schiffer in my previous post, working with SSL certificates on the NetScaler starts with the creation of the private key.

Screens Actions
  Log onto the management console of the NetScaler.
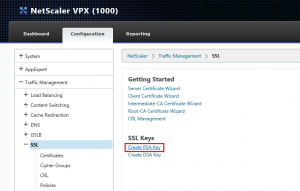
Expand Traffic Management in the left pane and select the SSL node.
SSLCertsOnNS01 In the right pane click on [Create RSA Key] in the SSL Keys section.
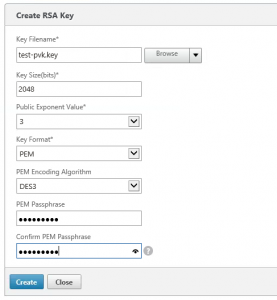
SSLCertsOnNS02 Specify a Key Filename and Key Size, like 1024 or 2048.
Make sure the PEM Key Format is selected, as shown in the screen shot.

Optionally: Select an appropriate PEM Encoding Algorithm (depends on your organizational policies).

Enter a PEM passphrase.
Click [Create] and then click [Close].

Note down the PEM passphrase as you will need to provide it later on when you want to import the certificate.

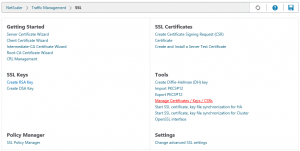
SSLCertsOnNS03 You can check if the private key is created successfully by clicking on [Manage Certificates/Key/CSRs] in the Tools section of the right pane.
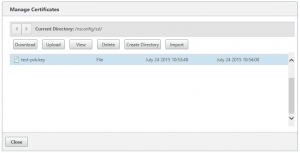
SSLCertsOnNS04 The private key file should be shown in the list of files.
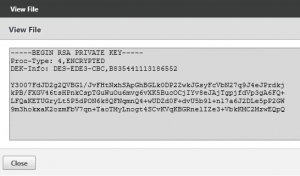
SSLCertsOnNS05 To view the content of the private key, select the file and click on [View] to open the file and be able to copy the content or save the file locally.


Creating the certificate signing request on the NetScaler

When a private key is created, you can continue to create a Certificate Signing Request on the NetScaler.

Screens Actions
  Log onto the management console of the NetScaler.
Expand Traffic Management in the left pane and select the SSL node.
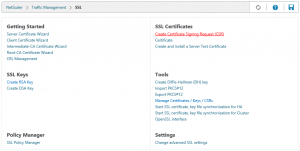
SSLCertsOnNS06 In the right pane click on [Create Certificate Signing Request (CSR)] in the SSL Certificates section.
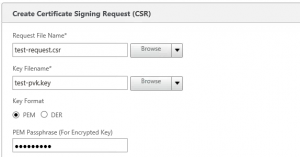
SSLCertsOnNS07 Specify a name for the csr file in the Request File Name field.
Browse for the private key file, created in the previous paragraph.
Select the right encoding type as the Key Format and enter the required PEM Passphrase if PEM is choosen.
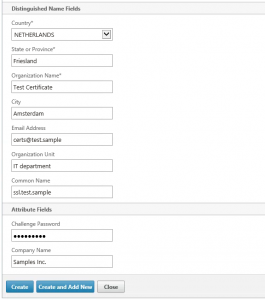
SSLCertsOnNS09 Specify the Distinguished Name and Attribute Fields for the CSR.
Click [Create].

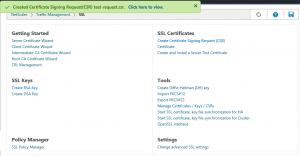
A notification is shown that the CSR is created successfully.

Click the [Click here to view] link to view the content of the request.

Make sure you double check the Common Name as this is the DNS name used to connect to the website. Also note down the chosen challenge password as you will need to provide this password later on.

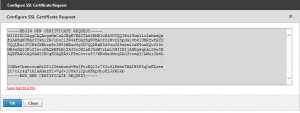
SSLCertsOnNS10 Click on [View] to copy/paste the Certificate Request or save it to a text file (on your local machine).
SSLCertsOnNS11 Click [Close].


Creating the certificate signing request with Internet Information Service

As some prefer to use the Internet Information Service console to generate the Certificate Signing Request (which automatically generates a private key), I have included the instructions in this blogpost as well

Screens Actions
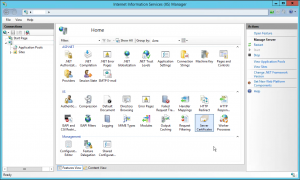
  Open the Internet Information Services (IIS) Manager and select the Server Name in the left pane.
SSLCertsOnNS12 Double click on Server Certificates
SSLCertsOnNS13 Click [Create Certificate Request…] in the Action Pane.
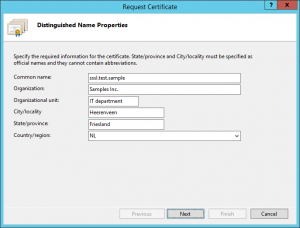
SSLCertsOnNS14 Specify the Distinguished Name properties and click [Next].
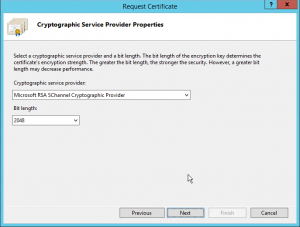
SSLCertsOnNS15 Select the appropriate Cryptographic service provider and bit length and click [Next].
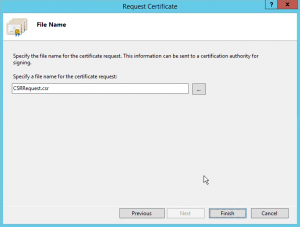
SSLCertsOnNS16 Specify a File Name for the CSR and click [Finish].

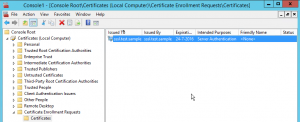
You can check for pending requests in the Certificates MMC for the Local Computer. The certificate requests are stored in the Certificate Enrollment Requests folder.

SSLCertsOnNS17 Checking the Certificate Enrollment Requests.


Importing a PKCS#12 (.pfx file format) certificate store on the NetScaler

If all goes well, you will receive your certificate in a PKCS#12 (certificate store) format from your Certificate Authority after you requested your certificate and provided them with the CSR. Even though Citrix offers a great support article (CTX136444) on the import of PKCS#12 file into the NetScaler, I did include the instructions in this blogpost to offer a complete reference. The NetScaler works best with PEM (Base64-encoded) certificate and needs to convert a PKCS#12 certificate store into a PEM certificate store format.

Screens Actions
  Log onto the management console of the NetScaler.
Expand Traffic Management in the left pane and select the SSL node.
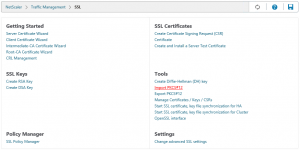
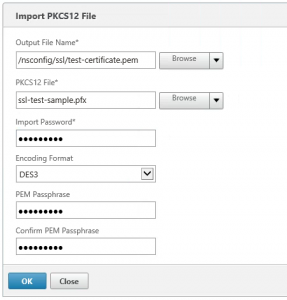
SSLCertsOnNS18 In the right pane click on [Import PKCS#12] in the Tools section.
SSLCertsOnNS19 Enter a name for the Output File Name (.pem file).
Browse to the location of the PKCS#12 file on your local system and provide the import password.
Enter a PEM Passphrase and click on [OK].

The import Password is the password of the pfx file, usually provided by the Certificate Authority together with the certificate.
The PEM Passphrase is the passphrase for the PEM certificate file the NetScaler creates as part of the file conversion it performs for the PKCS#12 file.

SSLCertsOnNS20 The PEM file is created on the appliance.

If you view the PEM file, you’ll notice that the private key as well as the certificates are included in the file.


Importing a PEM certificate store on the NetScaler

If a PEM (Base64-encoded) file is provided, the previous import step is not required and the certificate can be imported right away on the NetScaler using a different wizard.

Screens Actions
  Log onto the management console of the NetScaler.
Expand Traffic Management in the left pane and expand the SSL node.
Select the Certificates node.
SSLCertsOnNS21 Click in the right pane on [Install].
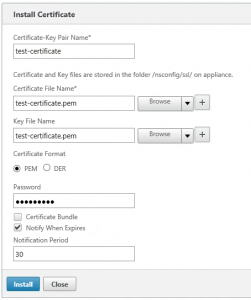
SSLCertsOnNS22 Specify a Certificate-Key Pair Name to uniquely identify the certificate.
Browse for the PEM certificate store.

As the PEM file also contains the private key, you can use the same file as the Key File Name

Select the PEM Certificate Format and enter the PEM Passphrase (of the PEM certificate store) in the Password field.
Select whether an expire notification should be given, enter the Notification period and click [Install].

SSLCertsOnNS23 The certificate is shown in the list of available certificates of the the SSL Certificates node.


Importing the root and/or intermediate certificates on the NetScaler

Root and intermediate certificates can usually be downloaded from the Certificate Authority as a single certificate PEM or DER encoded file. These files are usually not password protected.
You can import the intermediate and root CA certificates with the following steps:

Screens Actions
  Log onto the management console of the NetScaler.
Expand Traffic Management in the left pane and expand the SSL node.
Select the Certificates node.
  Click on [Install].
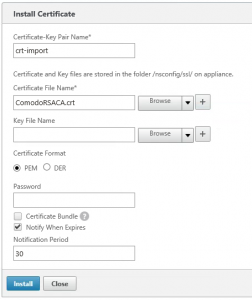
SSLCertsOnNS24 Specify a Certificate-Key Pair Name to uniquely identify the certificate.
Browse on the Local system for the downloaded Intermediate or Root CA certificate.
If the certificate is a PEM Base64-encoded file select the PEM Certificate Format and leave the Password field empty.
If the certificate is a DER-encoded file select the DER Certificate Format (no password is required).
Select whether an expire notification should be given, enter the Notification period and click [Install].
 
The certificate will be visible in the list of available certificates of the SSL Certificate node.


Creating the certificate chain on the NetScaler

To ensure no SSL Error 61 messages are shown when a user connects to a XenApp or XenDesktop site through the NetScaler, you will need to make sure that all certificates in the certificate chain (or certificate path) are available on the NetScaler and are linked correctly. To create a certificate path on the NetScaler you need to link the server certificate to the Intermediate CA certificate that issued it and the Intermediate CA certificate to the Root CA certificate that issued it. So each certificate needs to be linked to the Certificate Authority that issued the certificate to create the entire certificate chain from server certificate to root CA (and all Intermediate certificates in between). Here are the steps to link certificates on the NetScaler to create the certificate chain:

Screens Actions
  Log onto the management console of the NetScaler.
Expand Traffic Management in the left pane and expand the SSL node.
Select the Certificates node.
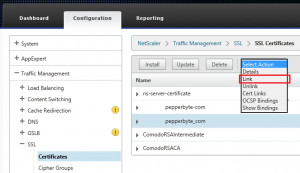
SSLCertsOnNS25 Select the Server certificate and select the Link action from the Action selectbox.
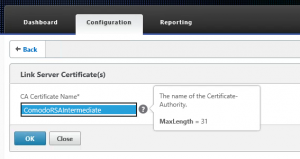
SSLCertsOnNS26 Select the Intermediate Certificate that is used to sign the Server certificate as the CA Certificate Name and click on [OK].
Repeat the same steps to link the Root CA certificate to the Intermediate Certificate to ensure the entire certificate chain is created.

You can check whether the certificates are linked correctly by selecting the Intermediate Certificate and selecting the Cert Links action from the Action selectbox.


Binding the SSL certificate to a virtual server on the NetScaler

After all the required actions are done to request the certificate, import the server, intermediate and root certificates and link them together to create the certificate chain we can finally assign (or bind) the certificate to the Virtual Server on the NetScaler.
As the NetScaler has different Virtual Server types, I’ve used a Gateway Virtual Server as an example. Even when a certificate is already assigned to the Virtual Server, the steps to perform will be the same.

Screens Actions
  Log onto the management console of the NetScaler.
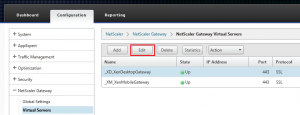
Expand NetScaler Gateway in the left pane and select the Virtual Servers node.
SSLCertsOnNS28 In the right pane select the correct Virtual Server and click on [Edit].
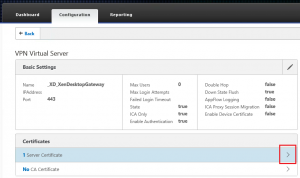
SSLCertsOnNS29 In the Certificates section click on the [>] icon after the (first) Server Certificate line.
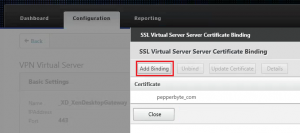
SSLCertsOnNS30 Click on [Add Binding] to select a server certificate from the list of available certificates.
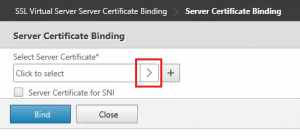
SSLCertsOnNS31 Click on [>] in the Select Server Certificate selectbox to view a list of all available certificates.
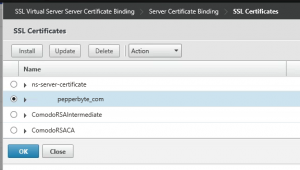
SSLCertsOnNS32 select the SSL certificate from the list and click on [OK].
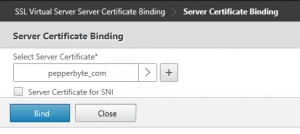
SSLCertsOnNS33 Click on [Bind].
  Click on [Done] to save the configuration changes for the Virtual Server.
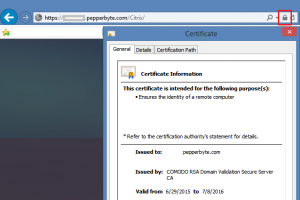
SSLCertsOnNS34 Open the virtual server website by browsing to the url with a web browser (I used Internet Explorer in the example) and view the certificate properties. If all went well the certificate does not show any errors (the cert links for the certificate chain are in place) and the right certificate information is shown.


Esther Barthel
Solutions Architect at cognition IT

Esther has been working in different roles and functions as an IT consultant ever since she finished her Masters degree in Computer Science in 1997. She has worked as a web developer, database administrator, and server administrator until she discovered how Server-Based Computing ( SBC ) combined servers, desktops, and user experience in one solution. Esther has been specializing in virtualization solutions such as SBC, VDI, application, and server virtualization for over eight years now and is currently working as a Senior Consultant at PepperByte, where she designs and implements Citrix® solutions for both small-business and large-enterprise infrastructures scaling from 100 to 15,000 users.
In january 2014 her first book Citrix XenApp 6.5 Expert Cookbook was published by Packt Publishing.

Esther is awarded as a Citrix Technology Professional (CTP) from 2015 - 2017.
Esther is awarded as a Microsoft Most Valuable Professional (MVP) in 2017.

Esther is a Citrix Certified Expert – Virtualization (CCE-V), Citrix Certified Professional – Mobility (CCP-M), Citrix Certified Professional – Networking (CCP-N) and RES Software Certified Professional (RCP).

2 thoughts on “HowTo: Importing SSL Certificates on the NetScaler

  1. Hendrik Klinge

    Hi Esther. Thanks for another encryption post. I like ’em.

    Tidbits:
    You wrote:
    Also note down the chosen challenge password as you will need to provide this password later on.

    No. Don’t. In fact leave the “challenge password” field empty. (And then update the screenshot at https://www.virtues.it/wpitq/wp-content/uploads/2015/07/SSLCertsOnNS09.png) Whatever you type in there will end up in clear text in the CSR. And you may not want this. What you type in there is not used for encryption of any kind.

    Nobody really understands this feature, but the idea was that you could communicate arrange a secret password with your certification authority. And if you should ever want to revoke your certificate, then they would ask you that “challenge password”. — But: No CA actually does this.

    Further details:
    https://security.stackexchange.com/questions/77028/whats-the-use-of-challenge-password-in-build-key-server-and-build-key-from-easy

    Cheers from Germany,
    Hendrik

  2. Esther Barthel Post author

    Hi Hendrik,

    Thanks once again for sharing your knowledge on the subject. Another learning experience for me as well 🙂
    I’ll update the post and add your explanation to it for sure, I love to get my facts straight 🙂

    Cheers,
    Esther