This blogpost is updated to include the improved command to generate a certificate with makecert that will be correctly identified as a server certificate on a Citrix NetScaler (for instance) version 11.1.
In my previous posts I explained SSL certificates and how to import them on the NetScaler. But wouldn’t it be nice if you could quickly create your own self-signed certificates for testing purposes?
As there are different options for creating certificates, I wanted to use a less popular tool than OpenSSL. There are already many blogs written on the openssl commands to create certificates, like this blog from Mitchell Anicas. And as OpenSSL can also run on a Windows, it would have been quite easy to write a script, using OpenSSL, for the creation of some self-signed certificates. But I wanted to share my knowledge of a different tool as I have had a lot of fun with Microsoft’s makecert utility, dating back to the days when I was still designing Web applications and managing Windows Web servers in the early days of my IT career.
So for me it was only logical to get reacquainted with MakeCert and see if I could still have some fun creating self-signed server certificates in my Windows-based homelab. And while I’m playing around in my homelab I might as well share the fun and blog about my simple self-signed certificate creation script.
So where did I get the tools?
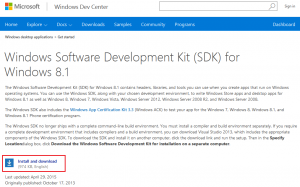
MakeCert is part of the Windows SDK, which can be downloaded from the Windows Dev Center Downloads page. The latest version is the Windows Software Development Kit (SDK) for Windows 10. But you can check the Windows SDK Archives for a version of the SDK for the older Windows operating systems.
I was running Windows 8.1 in my homelab when I was testing the script, so the instructions in this blog are based on the Windows SDK for Windows 8.1. And for those of you that are looking for the SDKs for Windows Servers, know that you can install the Windows SDK for 8.1 on Windows Server 2012 R2.
Developers can also install Visual Studio 2015 and the Windows Driver Kit (WDK) instead of a SDK to get a copy of MakeCert.
SDK installation
Now that you know where to find the right SDK for your Windows version, it’s time to install MakeCert (and a bunch of other tools) and have some fun:
| Screens | Actions |
|---|---|
|
You can download the Windows SDK for Windows 8.1 at https://msdn.microsoft.com/en-us/windows/desktop/bg162891.aspx. |
|
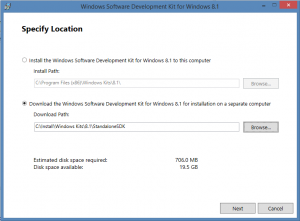
To download the standalone installer, select the download option and click [Next]. |
|
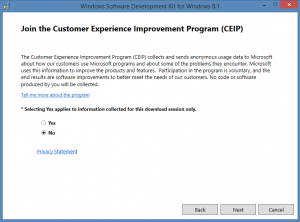
Join the Customer Experience Improvement Program (CEIP) or not and click [Next] |
|
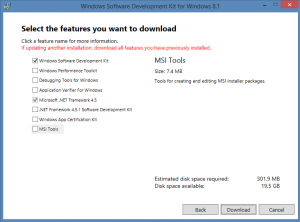
To install makecert, only the Windows SDK needs to be selected. Click [Download] to start the standalone download. %nbsp; Run sdksetup.exe from the specified download location to start the Windows SDK installation. |
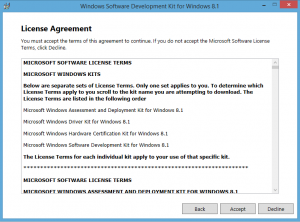
|
Accept the License Agreement by clicking [Accept] |
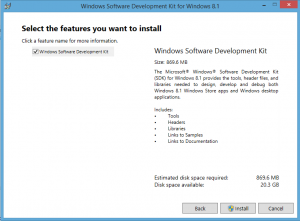
|
Select the features you want to install and click [Install] |
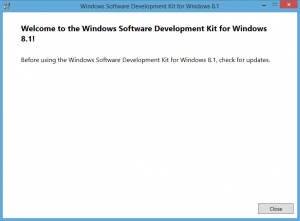
|
Finish the installation by clicking [Close] |
After the Windows SDK is installed it might take Windows a while before it indexes the new executables from the Windows SDK on your drive, so even after you install the tools, it might not show up immediately in Windows Search.
You can check the following locations to find makecert.exe:
| Windows SDK |
7: C:\Program Files (x86)\Microsoft SDKs\Windows\v7.1A\bin 8: C:\Program Files (x86)\Windows Kits\8.0\bin 8.1: C:\Program Files (x86)\Windows Kits\8.1\bin 10: C:\Program Files (x86)\Windows Kits\10.0\bin |
| Visual Studio |
2015: C:\Program Files (x86)\Windows Kits\10.0\bin 2013: C:\Program Files (x86)\Windows Kits\8.1\bin 2010: C:\Program Files\Microsoft SDKs\Windows\v7.0A\bin\ 2008: C:\Program Files\Microsoft SDKs\Windows\v6.0A\bin\ |
Explaining the MakeCert options
The makecert.exe command comes with an extensive set of options, devided in a basic and extended set. Make sure you get yourself acquainted with both sets as we’ll be using a mix of basic and extended options to create a certificate.
* Retrieve the available options for makecert:
REM Retrieve the basic options of makecert
makecert.exe -?

REM Retrieve the extended options of makecert
makecert.exe -!
To create a self-signed certificate file (and PVK private key file) that can be used on different systems, you can run the first set of parameters. If you also want to add the certificate to the certificate store on the Windows server (or desktop), run makecert with the second set of parameters.
* Create a self-signed (root CA) certificate:
REM Create a self-signed certificate file (CER) with makecert:
makecert -r -pe -n "CN=Test CA Root Authority" -a sha256 -sky signature -cy authority -sv CArootkey.pvk -len 2048 -m 13 CArootcert.cer
Which uses the following syntax:
- -r: Switch to mark the certificate as self-signed.
- -pe: Switch to mark the generated private key as exportable.
- -n: Certificate subject X500 name; starts with “CN=”. An example value is “CN=Test Certificate”.
- -a: Signature algorithm. Valid options are [md5|sha1|sha256|sha384|sha512]. Default to ‘sha1’.
- -sky: Subject key type. Valid options are [signature|exchange|[integer]].
- -cy: Certificate type. Valid options are [end|authority]. Use authority to create a CA (root or intermediate) certificate.
- -sv: Subject’s private key (PVK) file; will be created if not present.
- -len: Generated Key Length (Bits). An example value is 2048.
- -m: Number of months for the certificate validity period.
* Create a self-signed certificate and add it to a certificate store:
REM Create a self-signed certificate file (CER) and add it to the specified certificate store:
makecert -r -pe -n "CN=Test CA Root Authority" -a sha256 -sky signature -cy authority -sv TestCAkey.pvk -len 2048 -e 01/30/2016 -sr CurrentUser -ss Root TestCAcert.cer
Which uses the following syntax:
- -sr: Certificate store location. Valid options are [CurrentUser|LocalMachine]. Default to ‘CurrentUser’
- -ss: Certificate store name. Most common options are [AuthRoot|CA|My|Root]
- -e: End of validity period. Format is mm/dd/yyyy. Defaults to 2039.
The provided certificate store options for makecert link to the following certificate store names in the management console: My=Personal, AuthRoot=Third-party Root Certification Authorities, CA=Intermediate Certification Authorities,Root=Trusted Root Certification Authorities.
Personal certificates with private keys are usually stored in the ‘My’ store name. Self-signed certificates that need to be trusted are usually stored in the ‘Root’ store name.
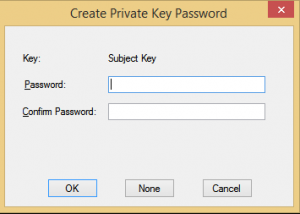
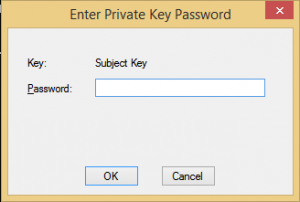
When using MakeCert to create a self-signed certificate it will show popups to enter the passwords for the private key. There is no option available to run MakeCert in silent mode and prevent it from showing the popup windows. You can check the following codeproject to use the provided JavaScript code to run MakeCert without the password popup windows
|
|
If you want to test certificate path (or certificate chain) that consists of multiple linked certificates, you can use the self-signed certificate to issue a second certificate that is linked to your self-signed certificate by using the following parameters with makecert.
* Create a (wildcard) server certificate signed by a root CA:
makecert -pe -n "CN=*.wildcard.example" -a sha256 -len 2048 -sky exchange -cy end -eku 1.3.6.1.5.5.7.3.1 -ic TestCAcert.cer -iv TestCAkey.pvk -sp "Microsoft RSA SChannel Cryptographic Provider" -sy 12 -sv wildcardkey.pvk wildcardcert.cer
Which uses the following syntax:
- -cy: Certificate type. Valid options are [end|authority]. Use end to create a server or client certificate.
- -eku: Comma separated Enhanced Key Usage based on Microsoft’s Object IDs (OIDs).
- -ic: Issuer’s certificate file.
- -iv: Issuer’s PVK file
- -sp: Subject’s CryptoAPI provider’s name
- -sy: Subject’s CryptoAPI provider’s type
You can use the following EKU and OID values for makecert.exe:
| Use | EKU | OID |
|---|---|---|
| SSL/TLS Web Server Authentication | serverAuth | 1.3.6.1.5.5.7.3.1 |
| SSL/TLS Web Client Authentication | clientAuth | 1.3.6.1.5.5.7.3.2 |
| Code signing | codeSigning | 1.3.6.1.5.5.7.3.3 |
| E-mail Protection (S/MIME) | emailProtection | 1.3.6.1.5.5.7.3.4 |
you can check a full list of Object IDs associated with Microsoft Cryptography at https://support.microsoft.com/en-us/kb/287547.
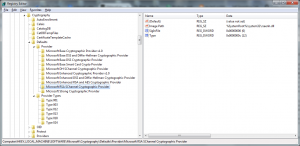
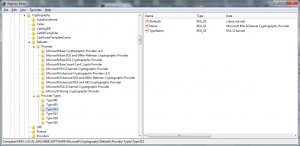
The subject’s CryptoAPI provider name must be defined in the registry subkeys of HKLM\SOFTWARE\Microsoft\Cryptography\Defaults\Provider. If both -sp and -sy are present, the type of the CryptoAPI provider must correspond to the Type value of the provider’s subkey.
|
|
Bonus: Convert the certificate to PFX format
To use the certificate it might be easier to combine the private key (PVK file) and certificate (CER) files to one PFX certificate archive file, containing both the private key and the certificate. Microsoft offers the pvk2pfx tool for the convertion, which is installed together with makecert.
* Convert the CER certificate to the PFX file format:
pvk2pfx /pvk privatekey.pvk /spc certificate.cer /pfx certificate.pfx /pi [password] /f
Which uses the following syntax:
- /pvk: Private key (PVK) input file
- /spc: Certificate (CER) input file
- /pfx: PFX output file
- /pi: PVK input file password
- /po: PFX output file password. Same as /pi password if not provided.
- /f: Switch to force the PFX file to be overwritten is it exists.
To test not only a self-signed certificate, but the entire certificate chain, I have used different commands in my script. The first command creates a self-signed root CA certificate and the second command creates a certificate signed by the root CA certificate.
My Certificate creation script
For reference purposes I have included my script:
REM Start javascript to automatically enter password in popup windows
start cscript MakeCertNoGUI.js

REM create root CA self-signed certificate (and add it to the Trusted Root CA Certificate Store)
makecert -r -pe -n "CN=My Personal CA Root Authority" -a sha256 -sky signature -cy authority -sv CAroot.pvk -len 2048 -sr CurrentUser -ss Root -m 48 CAroot.cer

REM Start javascript to automatically enter password in the popup windows (one additional popup window)
start cscript MakeCertNoGUI2.js

REM create wildcard certificate with specified end date (using the self-signed Root CA certificate)
makecert -pe -n "CN=*.wildcard.example" -a sha256 -len 2048 -sky exchange -cy end -eku 1.3.6.1.5.5.7.3.1 -ic CAroot.cer -iv CAroot.pvk -sp "Microsoft RSA SChannel Cryptographic Provider" -sy 12 -sv wildcard.pvk -e 01/01/2016 -sr CurrentUser -ss My wildcard.cer

REM convert wildcard CER to PFX
pvk2pfx -pvk wildcard.pvk -pi password -spc wildcard.cer -pfx wildcard.pfx -f
[wpfilebase tag=file id=10 /]
And a direct link to download my scripts (and tools).
The following sources have been used to create this post:
Windows Dev Center – MakeCert
Create a self-signed certificate for use with Windows Azure using a Windows script.
Certificates Authorities PKI
How to run Makecert without password window
Pingback: HowTo: Create self-signed certificates with PowerShell 4.0 | virtuEs.IT