In part 1 of this series on the new Access Gateway Enterprise Edition VPX appliance I explained the steps to configure the basis settings to set up the AGEE VPX. In order to use the AGEE VPX in a two-legged implementation I needed to implement some additional settings to make it work in the customer’s production environment and in my homelab as well with the right certificate settings (using self-signed certificates).
I like to implement the Access Gateway with a least two network interfaces so I can separate the internal and external network traffic and apply different firewall rules if required. You can read more on the different options and motivations in this blog from The Generation V.
So let’s further explain the configuration I used to have my AGEE VPX fully functional, serving both external and internal requests.
A simple representation of my network configuration is shown by the following drawing:
Checking the setup wizards configuration
I for one like to know what settings are made by setup wizards and where I need to add some additional settings to ensure a working configuration. So let’s start by checking the current settings on the appliance and see if more settings are required.
Checking the basic settings
| screendump | explanation |
|---|---|
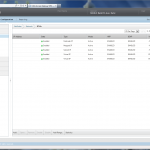
| Expand Network in the menu on the left and click on IPs. Check if all required IPs (especially the required SNIP IPs) are created and if not, use the [Add] button to add additional IP-addresses. For my homelab I needed to add the SNIP to ensure routing is in place to the external network. |
To ensure all components of the XenApp infrastructure can communicate with the Access Gateway, you’ll need to ensure you have at least one IP-address (SNIP or MIP) configured per subnet so all network traffic is routed through the right interface and both the external clients and the internal XenApp servers can communicate with the Access Gateway.
Keep in mind that the second VIP will be created later on when we configure our internal VIP and can be ignored for now. So all you need right now is:
- The NetScaler IP (NSIP) – 192.168.2.1 in our example (mgmt communication).
- The Mapped IP (MIP) – 192.168.2.2 (internal network/server communication).
- The Subnet IP (SNIP) – 192.168.1.1 (supports external network routing)
- The virtual IP (VIP) – 192.168.1.100 (external IP for client connections)
| screendump | explanation |
|---|---|
| Expand DNS in the menu on the left and click on Name Servers. Check if all required Name Servers are created and if not, use the [Add] button to add additional Name Servers. You can click on [Test] to check if the AGEE VPX can communicate with the Name Server. |
|
| Expand SSL in the menu on the left and click on Certificates. Check if the required certificates are available and if not, use the [Install] button to add additional certificates. You can check CTX109260 for instructions on on how to add certificates to your NetScaler and ensure they are linked in the right way. |
When you want to use a self-signed certificate, created by the NetScaler itself, you need to ensure that the certificate is created as a self-signed certificate during the setup of the Access Gateway Wizard (AG Setup = Config part 2 from part 1). This way your certificate is signed by itself and not by www.ns.com (all other created self-signed certificates on the NetScaler 10.0 build 71.6.nc), which was not recognized as a Trusted Root Certificate Authority on my Windows 2008 R2 servers in my homelab.
Also keep in mind that the full certificate chain must be installed and correctly linked in the NetScaler when adding purchased certificates.
| screendump | explanation |
|---|---|
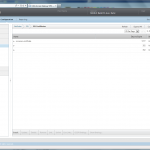
| Expand VPN in the left menu and navigate to Policies – Authentication/Authorization – Authentication – LDAP. Check the configured LDAP settings. You can use the Retrieve Attributes link to check if the AGEE VPX can communicate with the configured LDAP server. |
Now that we have checked some of the basic settings that were created by the wizard setups from part 1, we can continue with adding extra settings for our two-legged configuration of the AGEE VPX.
The following extra steps explain how we configure access for different Receiver clients to StoreFront and how we create a second VIP for internal communications and authentication.
Adding additional features to the configuration
In order to differentiate between the StoreFront services that are available, we need to create Session policies that redirects the Citrix Receiver to the right StoreFront service. The NetScaler uses so called session policies that can link to different URLs, depending on the HTTP requests that are made by the Receiver clients.
Information on how to Configure Session Profiles for CloudGateway Express can be found here on Citrix edocs.
Add VPN Policies Session settings
| screendump | explanation |
|---|---|
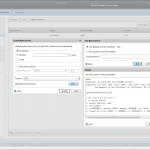
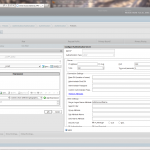
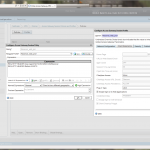
| Expand VPN in the left menu and navigate to Policies – Session. Click on [Add] to add a new policy for the Citrix Receiver Web. Fill out the following information:
Click on [New] to add a new profile, with the name Receiver_web_prof.
Add the following settings to the Published Applications tab:
|
|
| Expand VPN in the left menu and navigate to Policies – Session. Click on [Add] to add a new policy for the StoreFront services. Fill out the following information:
Click on [New] to add a new profile, with the name StoreFront_services_prof.
Add the following settings to the Published Applications tab:
|
|
| Expand VPN in the left menu and navigate to Policies – Session. Click on [Add] to add a new policy for the (legacy) PNA Services. Fill out the following information:
Click on [New] to add a new profile, with the name PNA_services_prof.
Add the following settings to the Published Applications tab:
|
And with these additional settings I’m concluding part 2 of this series as we are almost done with the configuration of our AGEE VPX.
The last steps of my configuration will be addressed in the next part of this blog series, which will look at the configuration of the internal VIP to finish the configuration for our AGEE VPX and be able to start using it.
So bare with me and stay tuned for part 3.
This post is part of a serie of multiple posts to fully cover the configuration of the AGEE VPX:
Out with the old, in with … AGEE VPX (part 1)
Out with the old, in with … AGEE VPX (part 2)
Out with the old, in with … AGEE VPX (part 3)
The following sources have been used to create this post:
TheGenerationV: NetScaler 1 or 2 arm mode “which is right for you?”
CTX109260 – How to Generate and Install a Public SSL Certificate on a NetScaler Appliance
Citrix eDocs – Configuring Session Profiles for CloudGateway Express

Pingback: Out with the old, in with … AGEE VPX (part 1) « virtuEs.IT
Pingback: Out with the old, in with … AGEE VPX (part 3) « virtuEs.IT