After explaining the manual configuration of visio layers in part 1, it is now time to add some VBA code to the mix and build ourselves a more user friendly interface to toggle the visibility (and printability) of the layers within a drawing.
In order to use the code I will provide, you’ll need to have VBA installed with your Visio installation and enable the use of Marco’s for your drawing.
But let’s not get ahead of ourselves and start with the basics on how to setup Visio to work with VBA.
Enabling the Developer tab
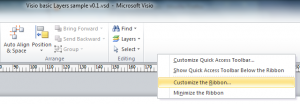
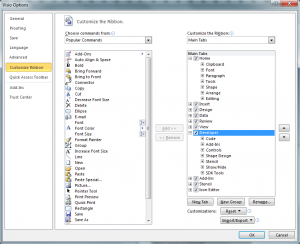
In order to be able to add VBA code to a Visio drawing, you first need to add the Developer tab to the Ribbon, this can be done with the following steps:
| Screens | Actions |
|---|---|
| Right-click on a free section of the Ribbon and choose the option ‘Customize the Ribbon…’ | |
| Select the tab Developer under the Main Tabs and click [OK]. | |
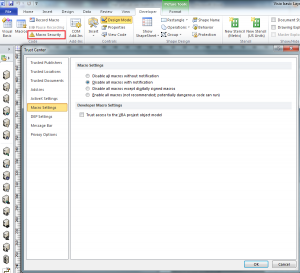
| This tab also holds a Macro Security button to quickly adjust your Macro settings if required. |
Now we have Visio all set up for the fun part!
Adding a button to your Visio drawing
The quickest way to offer your users a simple custom interface is through the use of a command button on your drawing, so let’s create one:
| Screens | Actions |
|---|---|
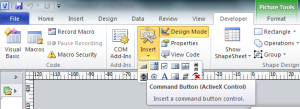
| Enable the Design Mode on the Developer tab of your Ribbon. | |
| Add a command button to your drawing. | |
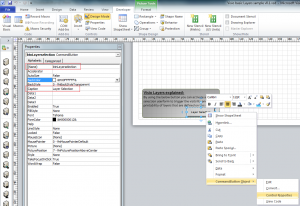
| Edit your command button properties by rightmouse-click on the button and selecting CommandButton Object – Control Properties. This opens a properties window in which you can edit properties like the name and caption of the command button. |
Building a User Form
The Command Button we have previously created needs to open a so called User Form that provided users with a simple interface to control the visibility of the layers in our drawing . So let’s create that User Form:
| Screens | Actions |
|---|---|
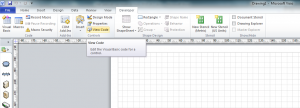
| Open the VBA window, by clicking on the View code button on the Developer tab of the Ribbon. | |
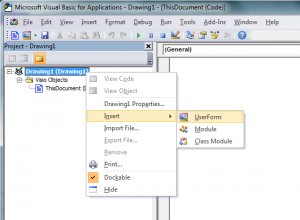
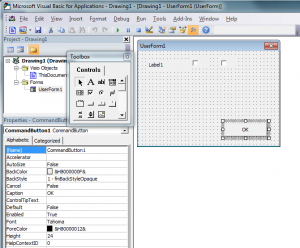
| Right mouse-click on the top object in the left pane (Drawing1 in the picture) and select Insert – UserForm. | |
| You can now add multiple controls to the User Form, to create the custom interface for the users. Use the Properties Window to name each control with a easily identifiable name. | |
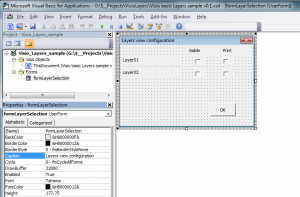
| I’ve created a user form with labels representing the Layer names as defined in the Visio drawing and check boxes for the visibility and print properties of each layer. The command button is in place to close the user form, so they can use the drawing normally. |
Stick around for the final part to get all the VBA code I used and a downloadable sample drawing.
The best goodies are yet to come!
This post is part of a serie of 3 posts to fully cover the Use of Visio layers to create custom views:
Using Visio layers to create custom views (part 1)
Using Visio layers to create custom views (part 2)
Using Visio layers to create custom views (part 3)

Pingback: virtuEs.IT
Pingback: virtuEs.IT
Pingback: Using Visio layers to create custom views (part 1) « virtuEs.IT
Pingback: Using Visio layers to create custom views (part 3) « virtuEs.IT
Pingback: Microsoft Visio