With Windows Server 2008 the newSID tool can no longer be used in combination with imaged deployment of servers. A deployment method that becomes even more important in Server Virtualization and Provisioned Infrastructures. Microsoft has improved the sysprep tooling by using XML config files and introducing the Microsoft Windows Automated Installation Kit (WAIK) to create the unattended answer files. For Windows Vista SP1 and Windows Server 2008, the WAIK version 1.1 can be downloaded here.
For Windows Server 2008 R2 and Windows 7 a different WAIK is to be used, which can be found here.
This post offers step-by-step instructions for the use of the WAIK to setup sysprep.
Windows Server 2008 installation files.
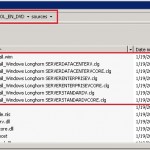
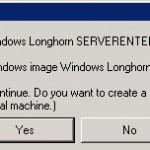
Sysprep uses the Windows Server installation and configuration files (install.wim and *.clg files). These files need to be available during the initial boot of the preparated system, either locally or through a network share. For this article I’ve copied the installation files (located in the sources subfolder of the DVD) to a local folder on the Windows Server.
| Screens | Actions |
|---|---|
|
The Windows System Image Manager (explained next) needs to have write access to the install.wim file, so make sure the folder and/or file are given enough access rights.
Windows System Image Manager.
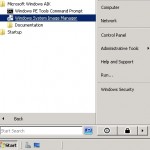
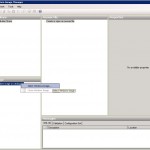
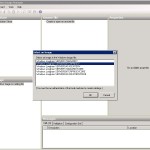
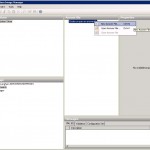
The easiest way to create the XML answer file for the sysprep proces, is to use the Windows System Image Manager (WSIM), which is installed by the Microsoft WAIK.
| Screens | Actions |
|---|---|
|
|
|
|
|
|
|
|
|
… now you are ready to add the different pre-defined settings to your answer file.
Sysprep Answer File Settings
In order to understand the effect of the different settings in the answer file, you need to understand the different stages during the Windows Setup Configuration Passes.
The stages that are most important for our sysprep settings are:
- generalize: A setting in the generalize pass enables you to automate the behavior for all deployments of this reference image. In comparison, a setting associated with the specialize configuration pass enables you to override behavior for a single, specific deployment.
- oobeSystem: The oobeSystem pass configures settings that are applied during the first-boot experience for end users, also called Windows Welcome.
- specialize: During the specialize pass of Windows Setup, machine-specific information for the image is applied.
Assign the settings you want to include in your sysprep file to one of the above stages.
* Building the Answer File
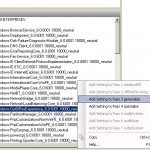
To build your answer file, use the following instructions:
| Screens | Actions |
|---|---|
|
|
|
* Answer File Options
You can set the following options for your answer file:
| Windows Setting | Answer File Setting & Options | Config Pass |
|---|---|---|
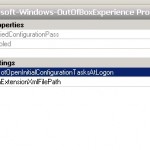
| Disable Initial Configuration Dialog | amd64_Microsoft-Windows-OutOfBoxExperience__neutral
|
generalize |
| Disable Server Manager Popup | amd64_Microsoft-Windows-ServerManager-SvrMgrNc__neutral
|
generalize |
| Product Key, Timezone and Registration Info | amd64_Microsoft-Windows-Shell-Setup__neutral
|
specialize |
Timezone: For a complete list of supported time zone entries, check the values listed in the registry under
HKLM\SOFTWARE\Microsoft\Windows NT\CurrentVersion\Time Zones.
Or you can use the tzutil command-line tool which is installed by default on Windows 7.
Examples are:
- GMT Standard Time for Greenwich Mean Time (GMT) which is also known as Coordinated Universal Time (UTC).
- W. Europe Standard Time for (UTC+01:00) Amsterdam, Berlin, Bern, Rome, Stockholm, Vienna)
| Windows Setting | Answer File Setting & Options | Config Pass |
|---|---|---|
| Screen Resolution & Color Depth | amd64_Microsoft-Windows-Shell-Setup__neutral * Display
|
oobeSystem |
| Do Not Show EULA again | amd64_Microsoft-Windows-Shell-Setup__neutral * OOBE
|
oobeSystem |
| Default Local Admin account password | amd64_Microsoft-Windows-Shell-Setup__neutral * UserAccounts – AdministratorPassword
|
oobeSystem |
| Input Locale & Language settings | amd64_Microsoft-Windows-International-Core__neutral
|
oobeSystem |
Input Locale: Input language and keyboard layout for a Windows installation.
You can either use the language identifier (en-US) or specify the locale ID and keyboard layout hexadecimal values (0409:00000409). The first value (0409) is the locale ID that represents the input language and the second value (00000409) is the keyboard layout value. Valid keyboard layout values are listed in the registry key:
HKLM\SYSTEM\ControlSet001\Control\Keyboard Layouts.
Multiple entries are seperated by semicolons.
For a list of the Default Input Locales, see Supported Language Packs and Default Settings.Examples are:
- United States – International = 0x00020409
- Dutch = 0x00000413
SystemLocale: Language used to display the text in menus and dialog boxes for programs that do not use Unicode.
UILanguage: Language of the user interface to use during Windows Setup or Windows Deployment Services (required for all unattended installations).
UserLocale: Language that is set for the (Default User Profile) Region and Language Options (Currency and Formats).
For a list of the Language Pack Default Values, see Available Language Packs.Examples are:
- Dutch (Netherlands) = nl-NL or 0x0413
- English (United States) = en-US or 0x0409
To add Internet Explorer Enhanced Security Configuration (IE-ESC) settings to you answer file, use the following options:
| Windows Setting | Answer File Setting & Options | Config Pass |
|---|---|---|
| Internet Explorer Security settings | amd64_Microsoft-Windows-IE-ESC__neutral
|
specialize |
Be aware that on 64-bits Windows Servers there can be two versions for the Application Settings. The application can have a 32-bits and a 64-bits version installed on the 64-bit machine (like Internet Explorer).
You’ll need to set the settings for both versions independently in the answer file. Duplicate the amd64 configuration settings in the wow64 component for the same settings.
In case you want to use the image for your Server virtualization environment (or TestLab) and you have a MAK for activating your Windows Server 2008, you can consider to have sysprep skip the rearm process:
| Windows Setting | Answer File Setting & Options | Config Pass |
|---|---|---|
| Internet Explorer Security settings | amd64_Microsoft-Windows-Security-Licensing-SLC__neutral
|
generalize |
Running Sysprep
After creating the answer file for the unattended installation, you are ready to run sysprep and use your answerfile.
* sysprep commandline options:
Use the following commandline options to start sysprep in unattended installation mode:
c:\windows\system32\sysprep\sysprep.exe /generalize /oobe /shutdown /unattend:[xml-answer-file]
Which uses the following additional syntax:
- xml-answer-file: The XML answer file build with the WSIM tool.
The sysprep proces will automatically run the Setupcomplete.cmd script if it is found at the following location c:\windows\setup\scripts. Use this file to delete the xml-answer-file or run other post-install commands.
Sysprep will not automatically delete the xml-answer-file itself.
The following sources have be used to create this post:
Brian Desmond – How To Sysprep in Windows 2008
Microsoft TechNet – Prepare to Capture an Image for Deployment
Microsoft TechNet – Unattended Installation Settings Reference
Microsoft TechNet – Available Language Packs
MSDN – Locale Identifier Constants and Strings
Microsoft TechNet – Default Input Locales
Microsoft TechNet – Windows Setup Configuration Passes
Microsoft TechNet – Manage Product Keys and the Activation Clock
Pingback: VirtuEs.IT
Pingback: Esther
Pingback: Tweets that mention Sysprep Windows Server 2008 « VirtuEs.IT -- Topsy.com
Pingback: Sysprep Windows Server 2008 « VirtuEs.IT | All about windows 7
Pingback: Sebastian Dony
Pingback: Sysprep Windows Server 2008 « VirtuEs.IT | Windows (7) Affinity
Pingback: Sysprep Windows Server 2008 « VirtuEs.IT